Monday, January 23, 2012

UNBOXING THE AG3

Ok, so I picked up my QVC clearance AG3. I need to make it abundantly (ABUNDANTLY) clear that this was on clearance. I paid $45+shipping for something that would cost me $90+shipping from the Aerogarden website. That's half-off, people!
Financially, a no-brainer.
But there was a catch!
According to Uncle Ben, "With great power comes great responsibility!" A lesser known quote of his is, "With a great deal comes reduced choice!" How true.
I was provided two color options from QVC: An electric blue/white combo (kinda reminded me of the original iMac) and a pink and white unit. I tried to make myself tolerate the blue unit but failed. And so I bought this:
Yes... Pink and White. Laugh it up. My daughter did.

Anyway, I'll add some thoughts about the unit, some pics and a special note about a small mod I did on it immediately after opening it.

Ok, below are the typical unboxing shots. I am pretty impressed at how they designed the unit, above, to be packed into this little, cubey box.
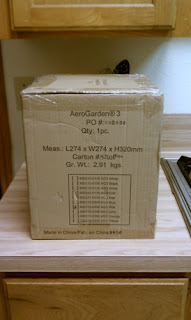
How do they fit it in there?

That's How!
Pull those compressed paper "shelves" out, and you get:

Yep, all this fit in that box.
Assembly was literally a "snap". The piece on the left is the basin plus the electrical base. The white middle piece is the 3-pod grow deck and the right-most pink "bicycle helmet" is actually the dome. Thankfully it uses the same flat bulbs as my extra. The white vertical piece with the pink thing on top is the neck of the unit. Lift basin off of the base, snap the neck into the base, replace basin, place grow deck on top of basin and snap the hood onto the top of the neck. That pink thing is actually a release button that allows you to lift and lower the hood, as needed.

Ahh yes, the hood. Now, my Extra hood has three of the flat lights and a reflective under-surface to shine some of the up-shooting light, back onto the plants. My AG3 hood's underside was simple, white plastic.

A few questions to ponder:
Does white reflect as much as a dedicated reflective surface? No.
Will almost all of the bulb's topside light be absorbed by the plastic, much of which will be as heat? Oh, yes.
Will said plastic become yellowed and dingy as a result? Yes, again.
Will a yellowed underside of the hood absorb even more light as heat, than when it was white, thus exacerbating the problem. A final, "Yes."

So I decided to address both issues. Long-term, I have no idea if my hood mod will hold up. It was pretty spur of the moment, once I realized the hod was white underneath:

Super Hood! Now with the power of FOIL!
Yep, I glued some crudely cut-up foil to the bottom of the hood. I didn't bother to get 100% coverage so it will be interesting to see if/when the yellowing occurs, and by how much. I hope the glue hold up but it was only an Elmer's glue stick, so who knows. I said it was spur-of-the-moment.

Monday, January 9, 2012

Structuring This Site


     When I start a particular plant growing, I am going continually edit the post so that all of the information associated with that growing will be contained together. This way you don't have to wander about the blog, as though you were on some crazy scavenger hunt. I will always begin the title of a crop blog post with "PLANTING". So that would be a good thing to search on to find info on the plants I am planting.

     Refer to the "Blog Archive" section, which will contain post titles. Since I will standardize on how I title my posts, this will also be a good way to find a post that covers what you want.

     I am going to try this with other things as well. Like general Aerograden tips, general observations.
So the bulk of the post entries should eventually be oriented around the crops I am growing and how that process goes. Otherwise, the tips, general info and other posts will probably just get larger over time. I suppose that if these other posts get too long, I'll go back and break them up into tighter, more closely related postings.

     Please leave constructive comments and questions. For example, if you are reading the tips post and you find that something is outdated or incomplete, or you know of a great tip. Place it in the comments. I'll address it. Who knows, your information just might wind up in the body of the post. With attribution, of course!

     Thank you for spending some of your valuable time here. My point for this blog is not to just spout off and electronically say, "Ooh, ooh, look at meeeee!" I really want this to be a helpful and information hub for all of your Aerogardening needs. To that end, when I find other online resources that I believe have useful and timely information, I will have not problems adding them as a link, or even promoting them in a posting.

Andy

UNBOXING THE AG7 EXTRA

On Wednesday, January 4th, 2012, I received my Aerogarden Extra.

The lighting assembly can be raised "extra" high. Up to about 2' above the deck where the plant pods go.

Assembly was pretty easy, as far as the unit went. Snap the hood arm into the base. Connect the trellis plates to the hood. Snap the lights into the hood. Snap the hood onto the hood arm. Place the basin into the base. Get your seed pods ready and snapped into the "grow deck". Add water and nutrients. Plug it in.
That's it. There really isn't a lot to it. You select your plant type after power-up and then get your lighting schedule situated.

Here are some setup pics:

First look in the box. So, where's my "extra"?


I Come in Pieces!


Hood with lights & trellis plates. Base + hood arm, behind